Last Updated on 21/06/2024 by Grant Little
Video
You can find a video based on this blog post on my YouTube channel
Introduction
In this article I’m going to demonstrate how we can work with Podman Desktop in IntelliJ IDEA.
When developing software, having access to containers can greatly aid and improve the quality of that software and the speed at which it can be produced.
For some use cases, rather than using mocks or a centrally shared instance of some services we can quickly spin up standalone instances of those same services, run our tests against them and then blow the containers away. This creates a consistent environment from which we are likely to create consistent results.
Examples of some services you might consider
- Relational Databases
- PostgreSQL
- MariaDB
- NoSQL Databases
- Redis
- MongoDB
- Messaging
- Kafka
- ActiveMQ
- Redis Streams
IntelliJ IDEA
IntelliJ IDEA is a commonly used IDE for the JVM. It has many great features and is constantly evolving.
It also has native support for working with Docker containers.
The built in features within IntelliJ allow you to work with Docker to create images, instantiate running containers from those images and manage them on one or more Docker Servers.
NOTE: It doesn’t currently have native support for Podman, but as we will see we can use some of the features of Podman Desktop and IntelliJ to allow the 2 products to work together.
Podman Desktop
For many, Docker Desktop was the go to solution for running containers on Windows and Mac. However, when the licensing was changed for commercial use, it made it a less attractive option for many organisations. As such some alternatives have started to pop up.
Podman (distinct from Podman Desktop) was designed specifically to try and remove the some of the security concerns of Docker. Particularly, the Docker daemon needed to run as the root user. Podman can run in either:-
- Rootless mode
- Root mode
In rootless containers are run under a specific user available on the host. Where as root mode is more comparable to the traditional Docker implementation where containers are run as the root user.
However, one difference is that primarily Podman doesn’t need a daemon to run at all. Everything can be done from the command line without the need for a running a daemon.
The Podman team made the podman CLI directly compatible with the Docker CLI, as such it was easy to swap from using Docker to Podman.
However, many of the tools already out there (including IntelliJ) didn’t use the the Docker CLI directly for many commands. Instead, they talked to the Docker daemon via a socket or TCP connection.
To enable this, the Podman team have introduced a similar concept. Again, the socket can be run in either rootless or root modes.
System Requirements
Windows
- Windows 10 or 11
- WSL2 (Windows Subsystem for Linux) – You will need the latest version of WSL2
- Sufficient Disk – TBD
- Sufficient Memory – TBD
- Admin privileges
Downloading Podman Desktop
Download the latest version from the Podman Downloads page.
Installation
NOTE These instructions assume your environment doesn’t have any special requirements such as using a corporate internet proxy or vpn.
Pre-configuration
I recommend you take the following steps to ensure your environment is up to date so it can run Podman Desktop and avoid issues.
Set WSL default version to WSL2
wsl --set-default 2Then update to the latest version of wsl
wsl --updateInstalling Podman Desktop
Once you have completed the steps above, you can go ahead and install Podman Desktop. Generally there isn’t much to do, you just need to wait for the Podman Desktop application to start after the install is completed.
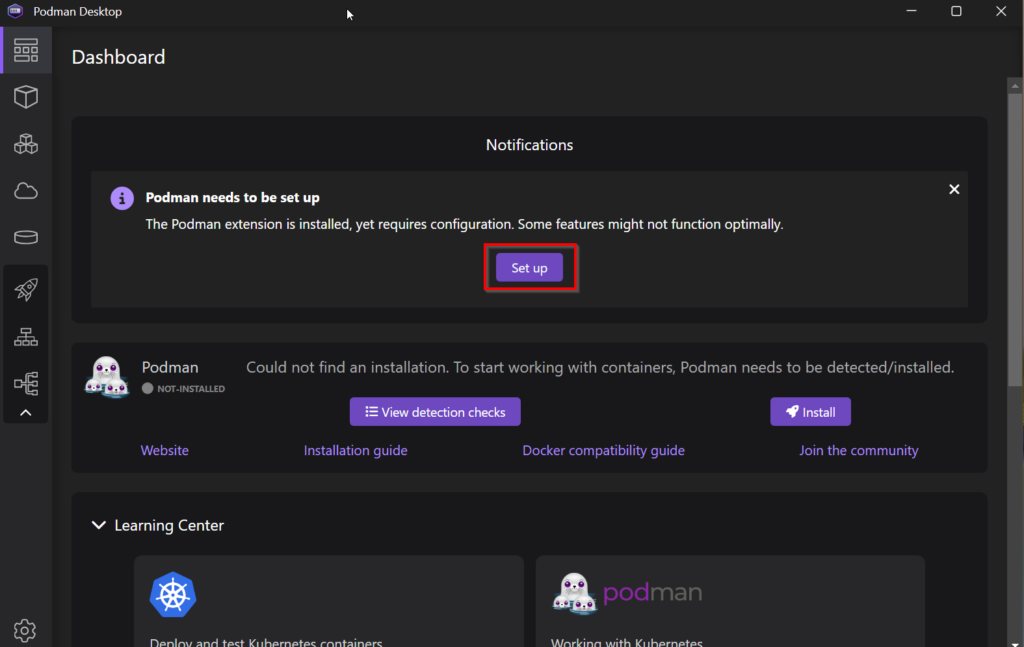
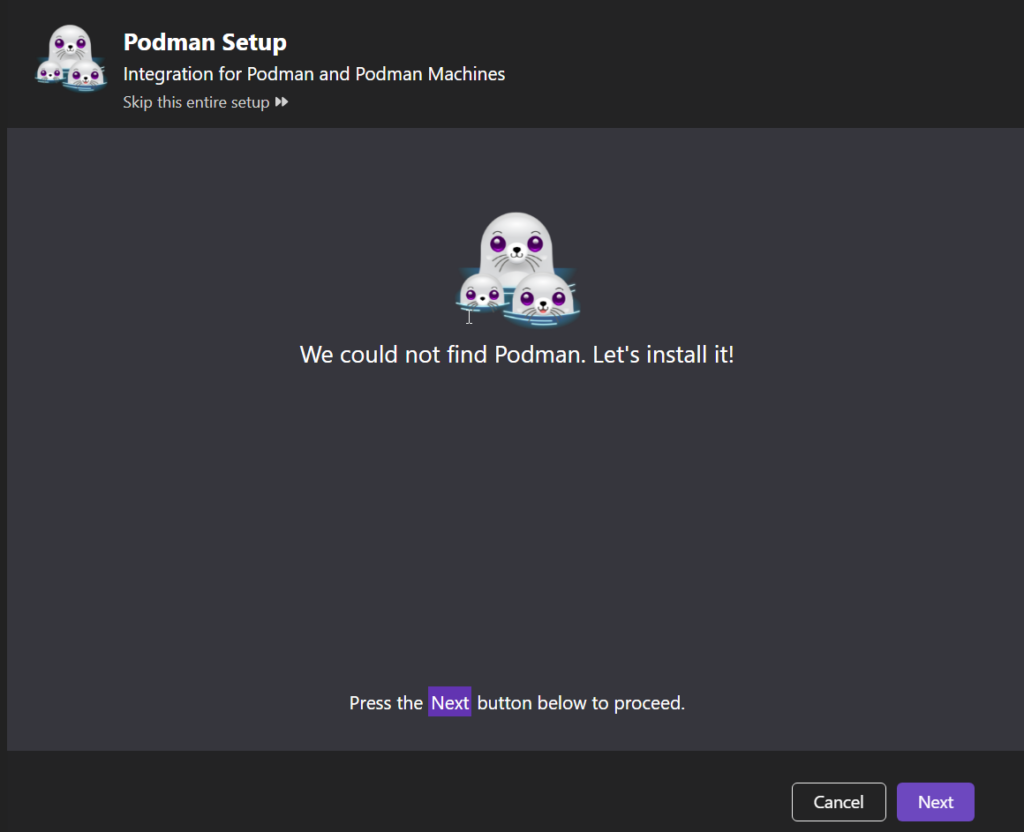
Once complete, you will be presented with a screen like the following. A notification pops up saying Podman needs to be set up. Click on this button to proceed. This is the process that installs the podman machine as a WSL distro. I would suggest you simply follow the suggested steps.
Follow the basic steps that follow. It’s fairly intuitive.
If Podman (separate from Podman Desktop) is not already installed, you will be prompted to install it
Configure the podman machine settings

Once complete, you should see the version of Podman that is running.
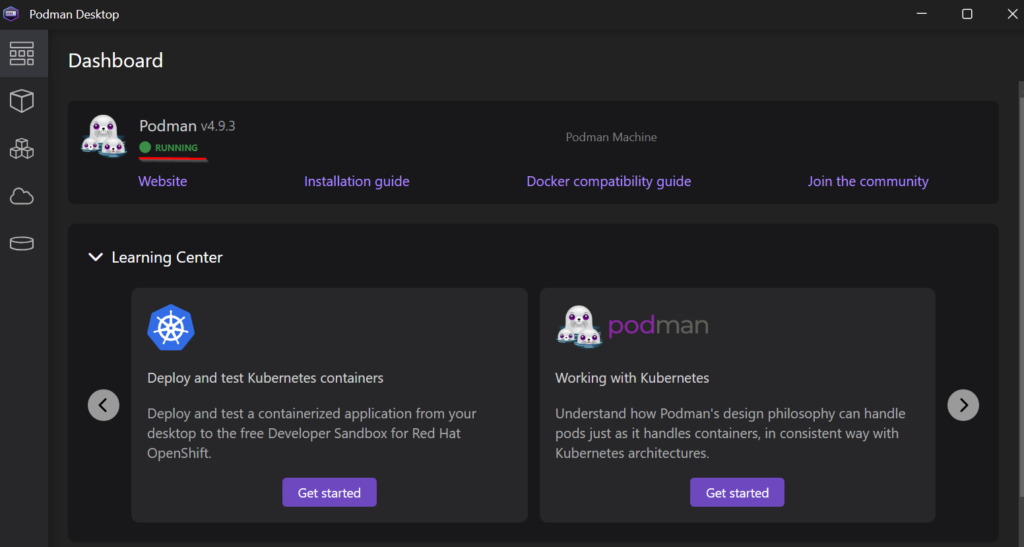
A word of warning, sometimes the earlier notification, still exists to “Set up” Podman. This can be confusing, but just bear in mind it’s just a notification from earlier.
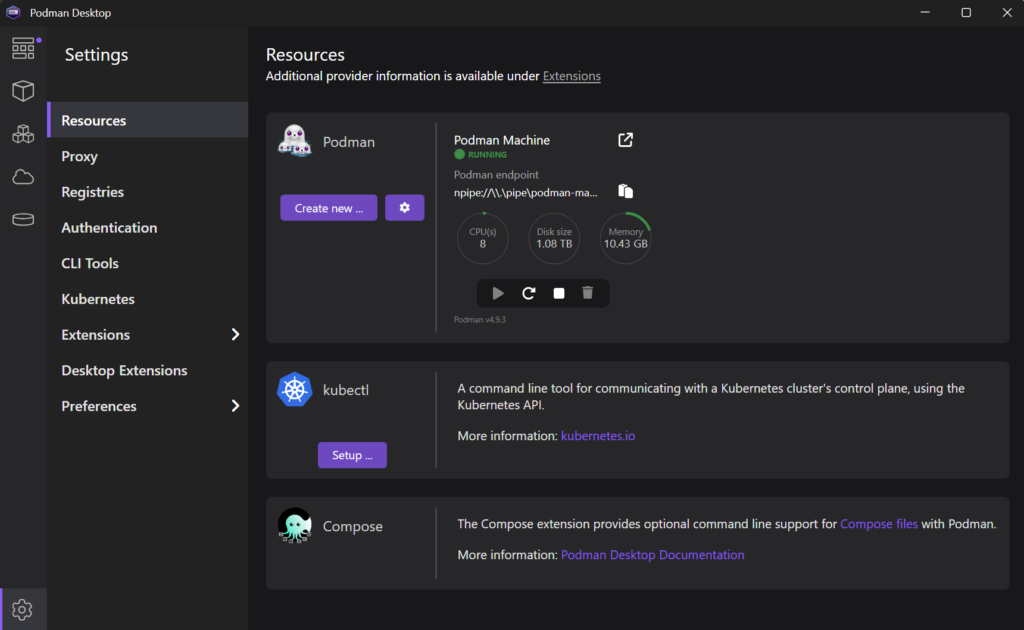
Next step is to setup some of the additional extensions that we would likely want to use. In particular this is docker compose extension, that allows the use of docker compose CLI to create environments that we can run within podman.
Click on “Settings” -> “Resources”. Scroll down to the Compose extension and click on “Setup” if it isn’t already installed. This will install the docker compose binary on the PATH of the host machine making it available for use.
NOTE you will be prompted for Administrator rights to enable this.
Configuring IntelliJ IDEA to Work With Podman
Open IntelliJ IDEA. Then open Settings. In the search box, look for “Docker”. Under “Build, Execution, Deployment” select the “Docker” option.
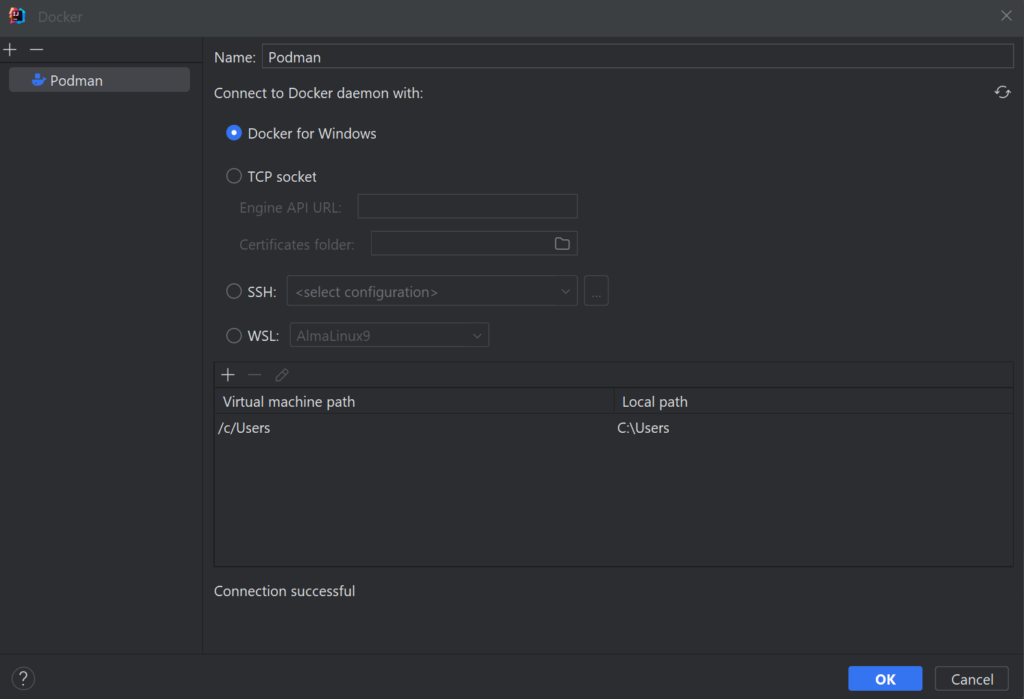
Click on the “+” to add a new Docker (really Podman) instance. Select “Docker for Windows”, then change the name from “Docker” to “Podman”. You should see a “Connection successful” at the bottom of the dialog box.
Before you close the settings, go to the “Docker” -> “Tools” Settings.
In the “Docker executable” text box, set the test to “podman.exe”
In the “Docker Compose executable” text box, set the test to “docker-compose.exe”
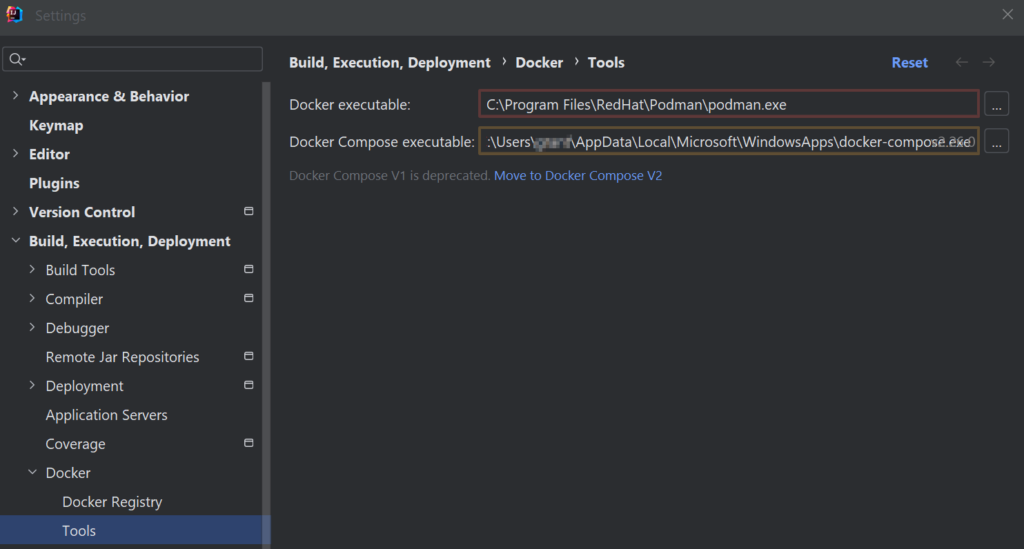
You can now save your settings.
Test Project
I have created a test project you can use to verify your configuration.
During the build process (Maven) it uses Testcontainers to spin up a PosgreSQL database and make sure the DB is running
It also includes a docker-compose.yml file that you can use for working with your application on your local machine should you need to.
You can check out the project from here https://gitlab.com/grantlittle/podman-desktop-test
Building the project
On the command line run
mvn verifyThis will build the code and run the unit tests in the project. As the Testcontainers project is used, if you look at the “Containers” window in Podman desktop, you should see 2 containers start up. One is the RYUK container, which is used by Testcontainers internally, then the other should be the Postgres container we need as part of our application.
To run the docker-compose.yml. Open the file in IntelliJ which is in the root of the project. At the top of the file you should see a double arrow next the the “services” element. Click on that and the docker-compose tool should be executed and you should be able to see the PostgreSQL database available in your IntelliJ Services window, and also within podman.
To shutdown the containers and tidy up. In IntelliJ, again inside the Services tool window. Right click on the “Docker-compose: podman-desktop-test” node, a context menu should pop up and from it select “Down”. This will destroy the container and tidy up
Conclusion
After running through the steps in this article, you should be able to
- Install Podman Desktop (and Podman)
- See containers running in Podman
- Run unit tests in IntelliJ that take advantage of Testcontainers
- Use a docker-compose.yml file to stand up services you need to develop against