
Last Updated on 21/06/2024 by Grant Little
Video
Check out my video on YouTube on this topic
Overview
A common use case for Spring Boot is to create small independent (micro)services. Having the ability to do this easily makes getting an application up and running more quickly more accessible.
Spring Initialzr is a simple web application that provides a UI driven approach to creating the building blocks of your application.
Spring Initialzr can be accessed from https://start.spring.io
Instructions
Start by visiting https://start.spring.io
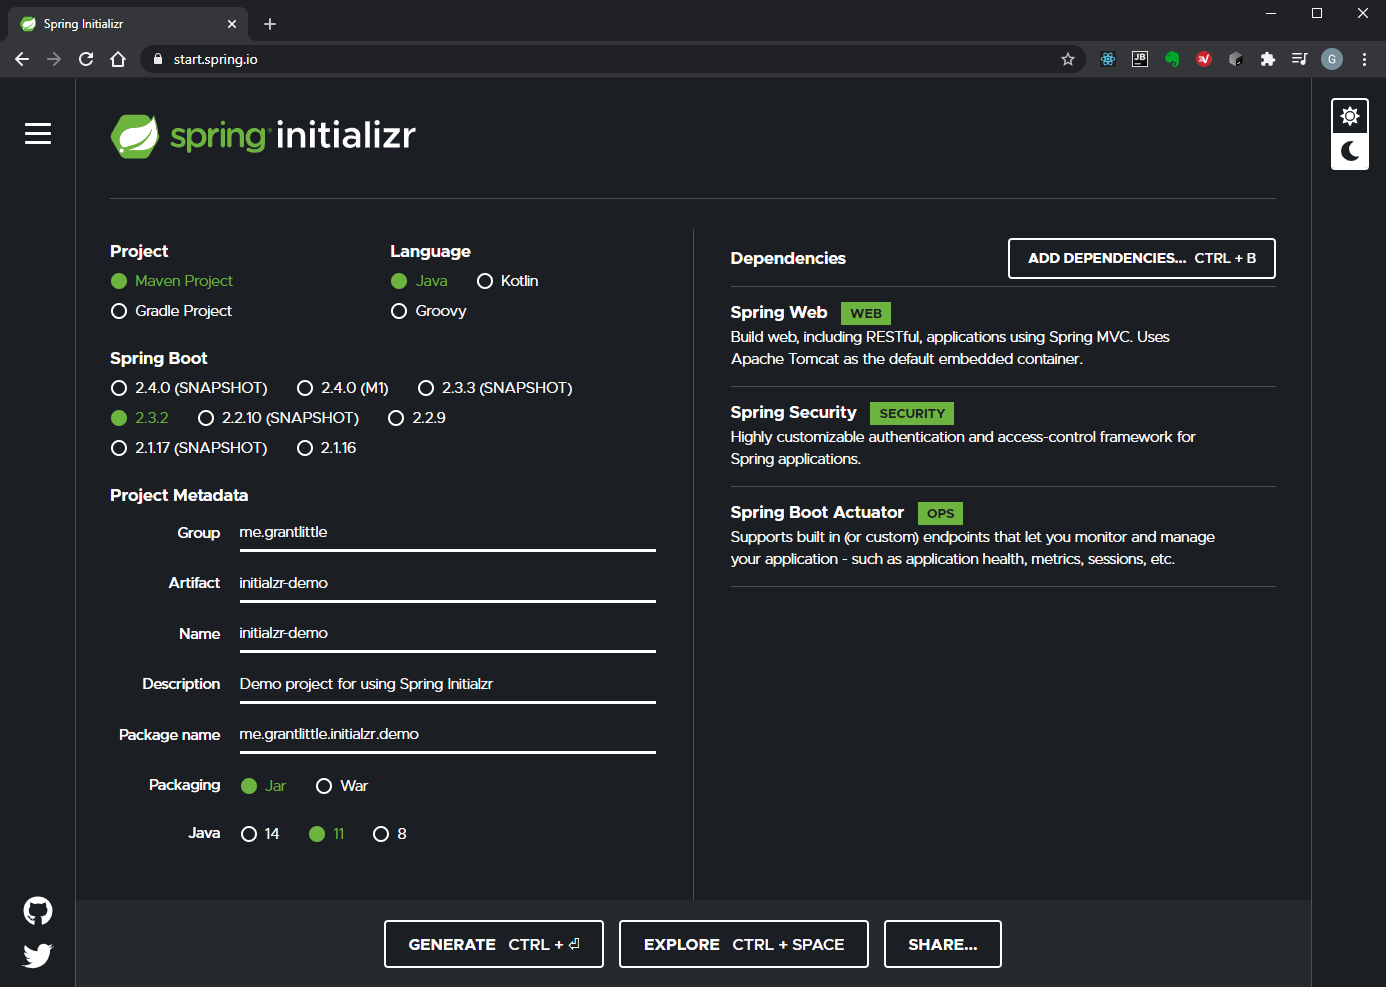
The page provided will then be Split into 2 sections in a two column format. On the left is your basic application settings. On the right are your dependencies or library requirements
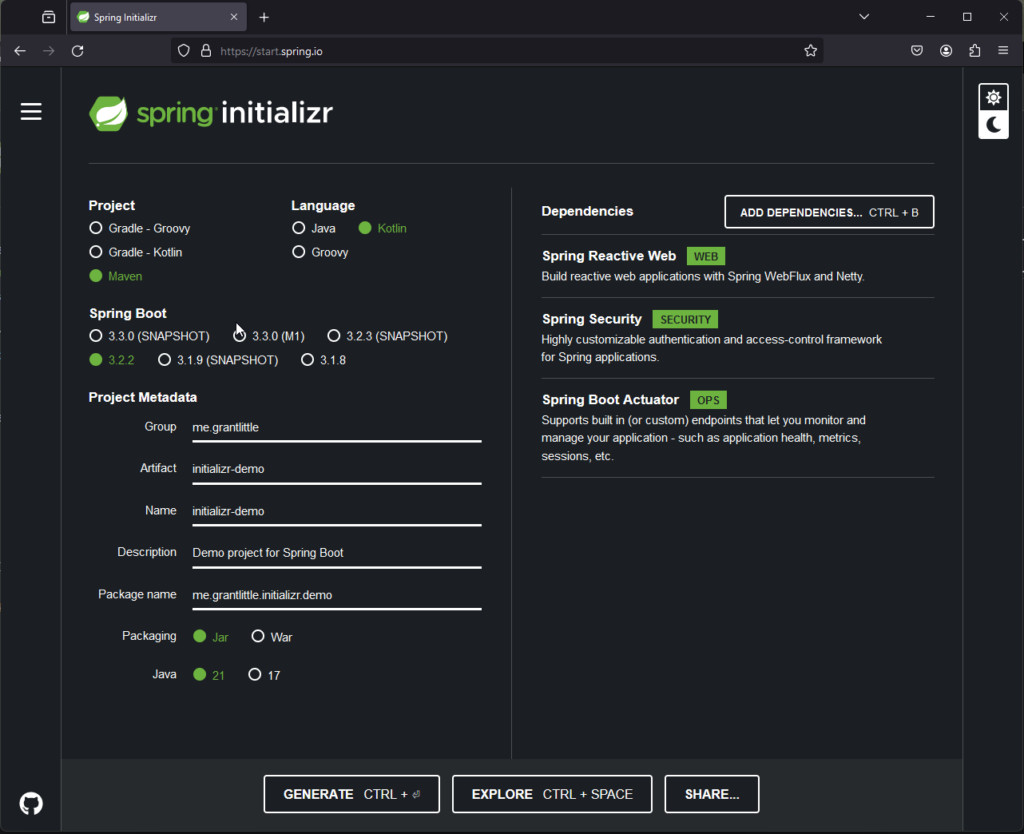
Basic Project Information
On the left is your basic application information.
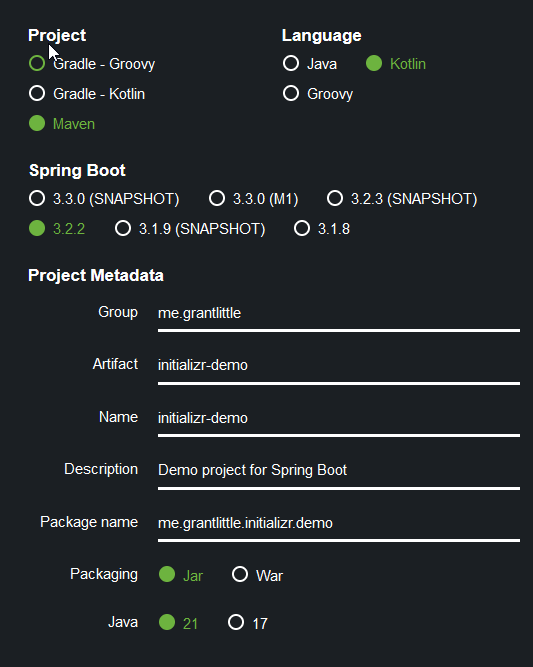
The build tool you want to use, options typically are:-
- Maven
- Gradle
The programming language you want to use:-
- Java
- Kotlin
- Groovy
The Spring Boot version you want to use. This will change depending on what current versions are available at the time.
on the right you add dependencies (libraries) that provide support for the frameworks or tools you want to use.
In “Project Metadata” you should enter the coordinates used for the project under the Mave/Gradle build systems. This is typically the:-
- Group
- Artifact
fields. You can use the:-
- Name
- Description
field to provide a name and description. The name is used under both Maven and Gradle. However then description is really only used by Maven and is added to the pom.xml file.
The “Packaging name” is the package that your source code will be under. This will be added to the created structure and some default classes added to that package.
Spring Boot supports deploying an application as either a:-
- Jar file
- War file
Typically a self contained JAR file is the most common these days, but WAR is used on occassions.
Finally choose the version of the Java Runtime that your project will run on.
Dependencies or Library/Framework Support
On the right, you will find the Spring Boot supported libraries or frameworks that can be added to your project. This are typically Spring Boot “Starter” dependencies that will self enable and have some basic configuration to get you up and running as quickly as possible.
Simply click on “Add Dependencies” or use the keyboard shortcut Ctrl+B (Cmd+B on Mac). A menu will pop up.
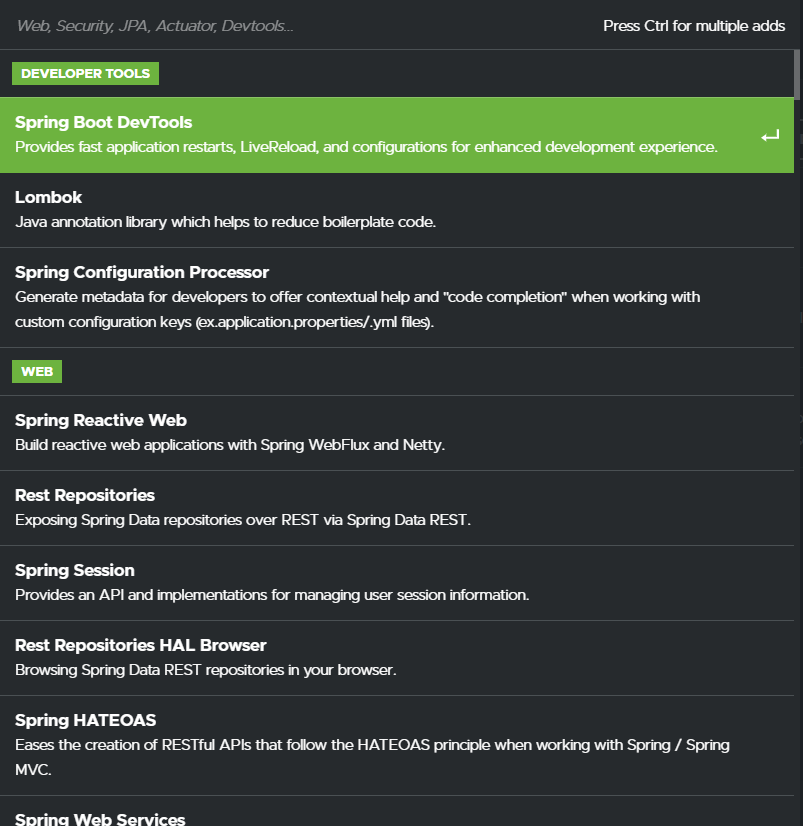
You can simply scroll through the list to select the options you want, or simply type something in the text field to have the results filtered. If you want to add multiple libraries, make sure you hold down the “ctrl” button (cmd on Mac).
Exploring the Project before Creating it
Before you actually create your project you have the opportunity to view what it should look like on your filesystem by clicking on the “Explore” button.
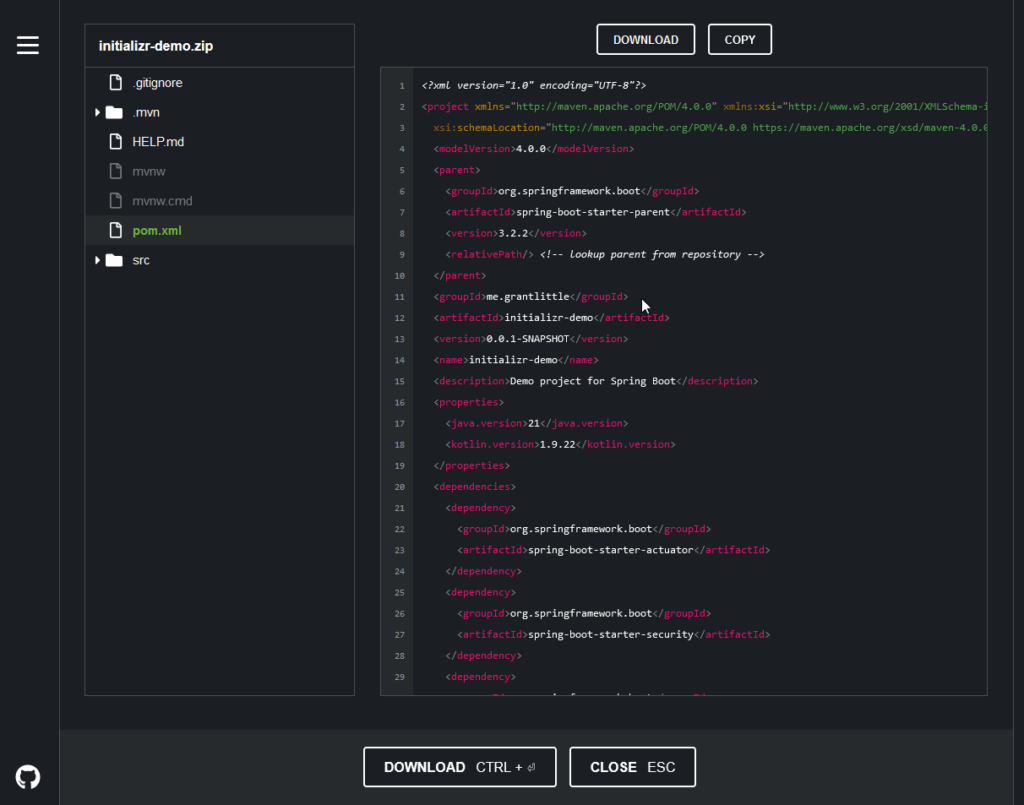
This will create a file browser type will where you can view the files that will be created.
Generating/Downloading Your Project
Once you are happy with your selections you can then simply download your created project which will be ready for use. It will be in a “ZIP” format to keep the file size small.
Unzip this project to a folder. The zip file will have a folder with your project name. So you would typically extract the contents of the zip to the location where you keep your development projects.
Building the Project
Depending on the build tool you have chosen you will have a number of options:
Gradle
If you have chosen Gradle, you will get a gradlew (*nix/mac), gradlew.bat (windows) that you can execute if you don’t already have Gradle installed.
Or if you already have Gradle installed you can use the “build.gradle” file directly.
Windows
./gradlew.bat bootRunMac/*nix
./gradlew buildMaven
If you have chosen Maven, you will get a mvnw(*nix/mac), mvnw.cmd (windows) that you can execute if you don’t already have Maven installed.
Or if you already have Maven installed you can use the “pom.xml” file directly.
Windows
mvnw.cmd compileMac/*nix
./mvnw compileRunning the Project
Running the generated component is again dependent on the build tool you choose i.e. Maven or Gradle
Gradle
Windows
./gradlew bootRunMac/*nix
./gradlew bootRunMaven
Windows
mvnw.cmd spring-boot:runMac/*nix
./mvnw spring-boot:runOverview
After completing this tutorial you should have a project that is capable of being run on your local development machine.
You can use this as a starting point for building your own services and business logic within your generated component.

3 Replies to “Creating a Spring Boot Project with Spring Initializr”