If you have an interest in aviation then you can get access to free premium accounts from both FlightAware & FlightRadar24 if you provide data into their networks. FlightAware will provide you with an Enterprise Account and FlightRadar24 will provide you with a Business account.
There is a small initial outlay to do this, but the cost is relatively low even compared to 1 years subscription to one of these services.
Probably the easiest way of doing this is to use a Raspberry Pi. You can easily buy these online these days for fairly cheap.
You can also use a Linux or Mac computer (Windows appears to no longer be supported) with a free USB port for the required dongle.
These instructions are going to assume you are using a Raspberry Pi though.
Requirements
A Raspberry Pi 3/4 with Raspberry PI OS installed, 8GB MicroSD card, access to the terminal and connected to the internet
You will need the following information (specifically for MLAT calculations)
Your antennas longitude
Your antennas latitude
Your antennas height above sea level
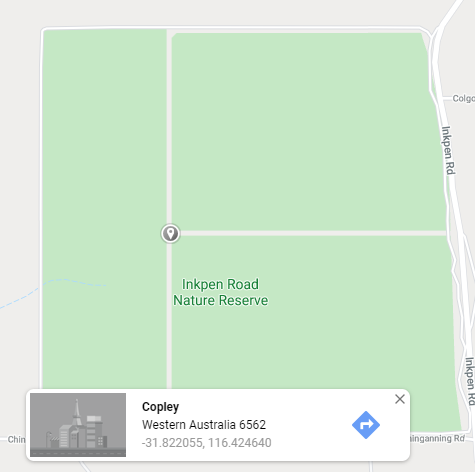
To find your longitude and latitude you can use Google Maps. Simply find your location on the map and click on that location. As an example I’ve chosen a random location within Western Australia and you can see the longitude and latitude at the bottom
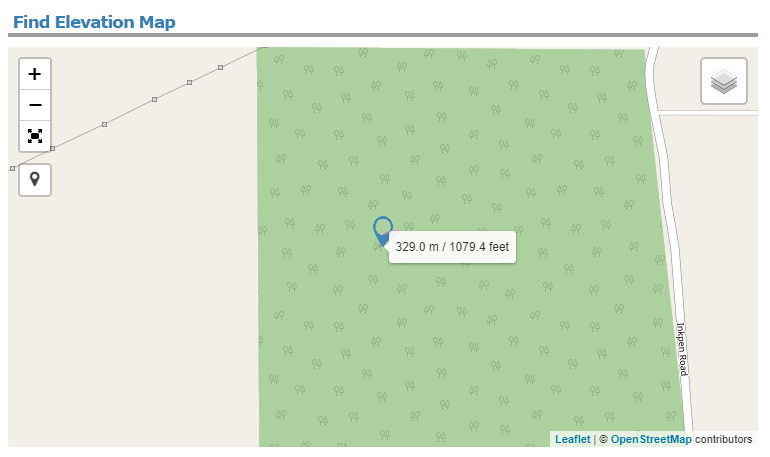
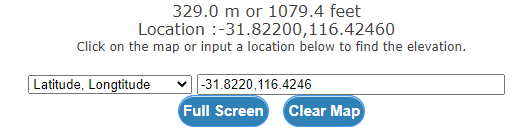
To find your antennas height above sea level, find the height above sea level using https://freemaptools.com/elevation-finder.htm. Enter the co-ordinates you have found from Google Maps.
Add the estimated height of the antenna from the ground to this value to get the height above sea level. MLAT calculations require a level of accuracy, so please try and get this as accurate as possible.
At this point it is probably a good idea to restart your Raspberry PI to make sure everything is running and started correctly. You can do this by running
sudoreboot
JavaScript
Once this is complete, after a few minutes the data should start being sent to FlightAware. You can check this by using the following link https://flightaware.com/adsb/piaware/claim to claim your feeder.
Then to view your data feeder statistics you can click on https://flightaware.com/adsb/stats/user/<username> You will need to replace <username> with your FlightAware username that you created earlier.
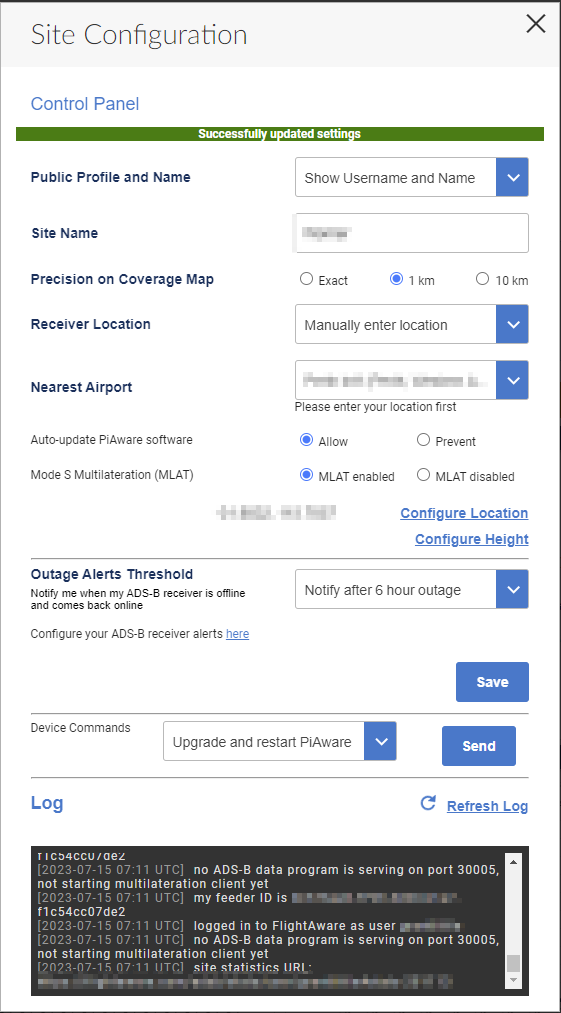
More than likely you will only have one site defined, if so click on the “cog wheel” (settings) to the right of the site name.
Use the “Configure Location” and “Configure Height” to enter your location and height. Make sure you select “I know my antenna’s elevation above sea level (advanced)” with the calculation you performed earlier.
Once you have entered those details, you can click on “Send”. This will send the updated details back to your Raspberry Pi. Allow a minute or so for this to happen.
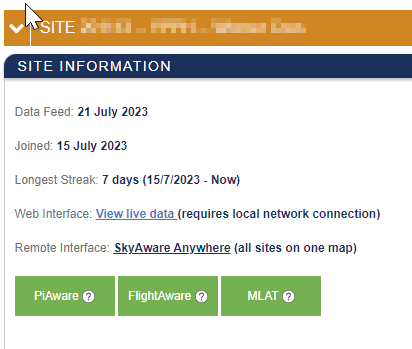
Once everything is configured then you should see all three indicators in the green:-
You should also be able to view a map with the aircraft being actively tracked. To do this click on the following link (View live data):-
This will redirect you to the PiAware software installed on your Raspberry Pi.
Upgrading
If you have has a previous installation of piaware and want to keep your statistics, then you can do so.
Replacing <unique identifier> with the value you copied from the webpage.
Then simply restart piaware
sudosystemctlrestartpiaware
JavaScript
FlightRadar24
The following instructions assume you have already installed FlightAware as we will re-use some of the utilities already installed as part of FlightAware.
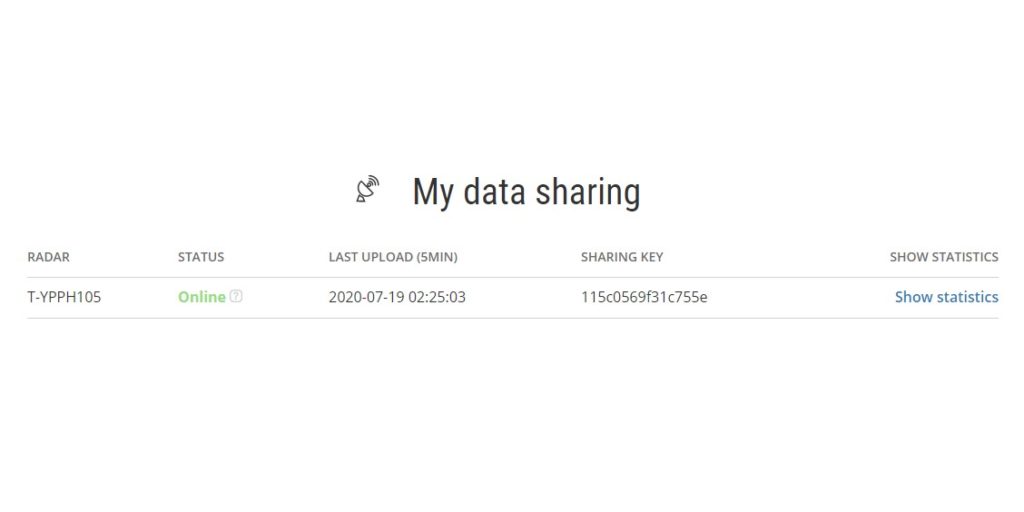
You will be prompted to enter a data sharing key if you already have one. If not simply leave it blank. If you do, then enter it here.
Step1.2-IfyouusedtofeedFR24withADS-Bdatabefore,enteryoursharingkey.Ifyoudon't remember your sharing key, you can find it in your account on the website under "My data sharing".https://www.flightradar24.com/account/data-sharingOtherwiseleavethisfieldemptyandcontinue.$:*****************************Verifyingsharingkey...OK
JavaScript
Enter your location and height settings for MLAT
Step1.3-WouldyouliketoparticipateinMLATcalculations? (yes/no)$:yesIMPORTANT:ForMLATcalculationstheantenna's location should be entered very precise!Step 3.A-Enterantenna's latitude (DD.DDDD)$:-**.****Step 3.B-Enterantenna's longitude (DDD.DDDD)$:***.****Step 3.C-Enterantenna's altitude above the sea level (in feet)$:***Using latitude:-**.****, longitude:***.****, altitude:***ftabovesealevel
JavaScript
Reuse the software already installed as part of FlightAware (dump1090-fa)
You should now be able to go the FlightRadar24 website and access your statistics (it might take a little time for aircraft stats to feed through).
It is likely that you will have automatically been upgraded to a business account (however it might take a little bit of time).
ADSBExchange
In the interest of keeping the data you provide openly available and not just provided to commercial sites. I suggest you also send the data to ADSBExchange.
The following instructions assume you have already installed FlightAware as we will re-use some of the utilities already installed as part of FlightAware.
I have now updated the document with the latest version of piaware as well as details for if you are upgrading from a previous piaware feeder installation
I want to supply data to ADSB-Exchange for the openness (am near a mil apt, so hope to get some new, interesting data here). But as a person not so adept at hardware and hacking– is there a chance to use a free FR24-provided unit and feed (FR24 of course, and) ADSB-E? Or what is the best plug&play unit (not the $290 one sold vie ADSB-E) to purchase?
Thanks
Marty
You always need at a minimum a USB DSB dongle. You can buy these online, I think they are about USD$50, often they come with a small desktop aerial. You then need a computer to plug it into. If you have a home computer that you leave running all the time then you can use that. If not, then the cheapest option is a Raspberry Pi, which is effectively a small computer (no monitor mouse etc), there are lots of instructions around on how to set them up (it’s really quite simple). If you don’t feel like that, then I think you will probably have to buy one of the device they have on sale. I really couldn’t tell you how much they cost. The setup I built at home is pretty simple (Raspberry Pi & USB dongle). Probably spend $150-$160 in total.
You can’t have 2 different services using the same port.
The only thing you could do would be to install a reverse proxy (haproxy for example) in front of the services (using a different port 80/443), then based on a path proxy the calls, e.g.
This can sometimes get a little messy for UI apps, as you effectively have to re-write the inbound URL requests, or somehow change the context path of the 2 applications. I have no idea if they support this.
Thanks for this information and instructions. I seem to have done things differently insofar as i have installed Flight Radar24 first (Pi 4) and now would like to share data with Flight Aware and ADSBE.
Could you kindly explain how I would go about doing this please?
Sorry, very late reply, somehow I missed this one. Without trying it, I’m guessing the process isn’t too different, but without specifically going through it I’m afraid I can’t provide specific instructions.
I realise this response is very late, so I hope you have managed to resolve it in the interim. I would be interested to hear how different the process would be.
Could you help me Please? I’m new to Raspbrerry Pi.
At the moment I supply data to ADSB Exchange and Flight Aware on two seperate Raspberry Pi’s and would like to get them all on to one along with Flight Radar 24. I’m using the Pi with Flight Aware on it and trying to run the command for Flight Radar, but Flight Aware is running and I don’t know how to add the command.
Sorry I’m completely new to this and any help would be greatly received.
Thanks
John
Sorry I can’t really help on this one. It’s not a configuration I have come across. It might well be possible, but the configuration would likely require some better knowledge of the internals of the software.
However, I did have a quick Google and came across this GitHub project for 2 receivers. Maybe that can help point you in the right direction.


Thanks for this post! Very concise and easy to follow.
I had an error trying to get the piaware-repository file so I had to run this command first: “wget https://fr.flightaware.com/adsb/piaware/files/packages/pool/piaware/p/piaware-support/piaware-repository_3.8.1_all.deb“
Good point, I missed getting the actual deb package. I’ll add in the instructions for that soon. Thanks for the feedback
I have now updated the document with the latest version of piaware as well as details for if you are upgrading from a previous piaware feeder installation
I want to supply data to ADSB-Exchange for the openness (am near a mil apt, so hope to get some new, interesting data here). But as a person not so adept at hardware and hacking– is there a chance to use a free FR24-provided unit and feed (FR24 of course, and) ADSB-E? Or what is the best plug&play unit (not the $290 one sold vie ADSB-E) to purchase?
Thanks
Marty
You always need at a minimum a USB DSB dongle. You can buy these online, I think they are about USD$50, often they come with a small desktop aerial. You then need a computer to plug it into. If you have a home computer that you leave running all the time then you can use that. If not, then the cheapest option is a Raspberry Pi, which is effectively a small computer (no monitor mouse etc), there are lots of instructions around on how to set them up (it’s really quite simple). If you don’t feel like that, then I think you will probably have to buy one of the device they have on sale. I really couldn’t tell you how much they cost. The setup I built at home is pretty simple (Raspberry Pi & USB dongle). Probably spend $150-$160 in total.
Not sure if that helps you or not
PS sorry for late reply
Is there an easy way to have the adsbx on the same port as Flightaware (8080)?
You can’t have 2 different services using the same port.
The only thing you could do would be to install a reverse proxy (haproxy for example) in front of the services (using a different port 80/443), then based on a path proxy the calls, e.g.
This can sometimes get a little messy for UI apps, as you effectively have to re-write the inbound URL requests, or somehow change the context path of the 2 applications. I have no idea if they support this.
Thanks for this information and instructions. I seem to have done things differently insofar as i have installed Flight Radar24 first (Pi 4) and now would like to share data with Flight Aware and ADSBE.
Could you kindly explain how I would go about doing this please?
Sorry, very late reply, somehow I missed this one. Without trying it, I’m guessing the process isn’t too different, but without specifically going through it I’m afraid I can’t provide specific instructions.
I realise this response is very late, so I hope you have managed to resolve it in the interim. I would be interested to hear how different the process would be.
Hi Grant,
Could you help me Please? I’m new to Raspbrerry Pi.
At the moment I supply data to ADSB Exchange and Flight Aware on two seperate Raspberry Pi’s and would like to get them all on to one along with Flight Radar 24. I’m using the Pi with Flight Aware on it and trying to run the command for Flight Radar, but Flight Aware is running and I don’t know how to add the command.
Sorry I’m completely new to this and any help would be greatly received.
Thanks
John
Hi John,
Sorry I can’t really help on this one. It’s not a configuration I have come across. It might well be possible, but the configuration would likely require some better knowledge of the internals of the software.
However, I did have a quick Google and came across this GitHub project for 2 receivers. Maybe that can help point you in the right direction.
Cheers,
Grant